It's actually easier than it seems-- You'll need a ballpoint pen or tracing stylus, white transfer paper, pins, and (optional) clear tape.
The process is pretty basic-
1. Make a copy of your pattern.
2. Position it on your fabric, face up with the transfer paper underneath it, and pin it in place.
3. Trace over it, bearing down hard enough to make a mark on the paper.
4. Stitch!
Read on for more detail and photos.


First of all, make a copy of your pattern that you're willing to basically destroy. Trace it, scan it in your computer and print it, go to Kinko's and make a copy... You want it to be actual size. Don't reverse fonts.
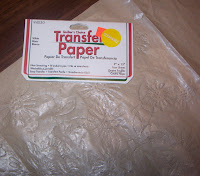
Select a piece of WHITE TRANSFER PAPER in the size of your design. I LOVE this Sullivans Quilter's Choice, but apparently they don't make it anymore. DMC's transfer paper rubs off very easily, but Dritz dressmaker's carbon works well. I haven't tried Jenny Hart's transfer paper as her supplies tend to be higher cost than their counterparts at other needlework supply companies.

(OPTIONAL) Tape the transfer paper to the pattern, along the top and bottom edges and wrong sides together, so that you can more easily position the design. (You can skip this step and just slide the transfer paper under the pattern as well. This step is helpful when the placement of the design is important).
Now, position your pattern and lay it transfer paper side down onto your black fabric. I strongly recommend pinning the pattern/paper to the fabric to avoid shifting. You could also use pattern weights, but pins work for me!
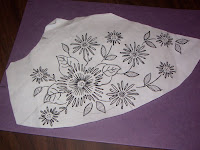
With a ball point pen or tracing stylus, trace over the entire pattern. It takes a little bit of practice to get the right pressure, but you're aiming for the amount of pressure you might need to sign something in triplicate. Many sites recommend a tracing stylus, but I don't see the necessity of buying one. I just use a ball point pen. Iactually use the pen WITH the ink in it so I can see where I've traced and where I haven't... I recommend using an old dry pen if you use this method on any fabric other than black, as you may poke through the fabric and mark it with the ink. My patterns look like this when I'm finished-- the other side becomes a raised up reverse of the front.

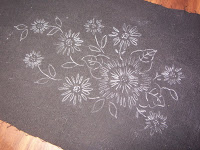
After you've traced over the entire pattern, your fabric should look something like this:

Now, hoop it up and starting stitching!
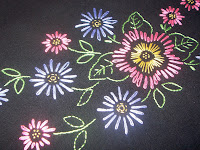
You'll end up with beautiful stitching on black:


No comments:
Post a Comment